
Some of Our Favorite Features of macOS 10.15 Catalina
Is Your Photos Library Too Big? Here’s How to Move It to an External Hard Drive
SSDs are essential for ensuring optimal performance on a Mac, but because they’re expensive, many people don’t have as much built-in storage space as they would like. If your Photos library has grown to the point where your SSD is nearly full, it might be time to think about offloading it to an external hard drive. (Don’t put it on a drive that you’re using as a Time Machine destination because there could be permissions conflicts, and note that Apple doesn’t recommend storing a Photos library on a drive shared over a network.)
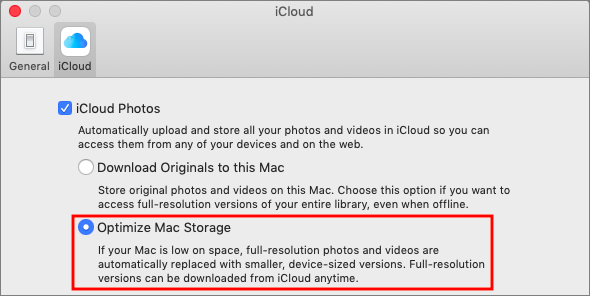
Before we explain how to offload your photos, we want to mention another way of reducing the Photos footprint on your drive. If you’re using iCloud Photos (previously called iCloud Photo Library) to sync photos and videos between your devices, the originals are all stored in iCloud. In Photos > Preferences > iCloud, you can enable Optimize Mac Storage, which swaps the full-resolution images for smaller versions, saving a boatload of space. However, you may find Photos somewhat slower to use, as it has to download full-resolution versions of images you work with, and you won’t have a local backup of the original images. So it’s an option, but it has tradeoffs.
For most people with burgeoning Photos libraries, a better approach is to offload the entire library to an external hard drive. This approach comes with tradeoffs too; accessing images from a hard drive is slower than getting them from an internal SSD, and you have to figure out how you’re going to back up that drive as well. Plus, the drive has to be available, connected, and turned on (so you have to listen to it) for you to use Photos at all, which might be especially annoying if you regularly work remotely on a notebook Mac.
To move your Photos library to an external drive, follow these steps:
- If it’s running, quit Photos.
- In the Finder, drag Photos Library, which is stored in your Pictures folder by default, to the external drive. A few answers to common questions:
- Where on the external drive should I put it? It doesn’t matter, but we recommend putting it at the top level so you are less likely to lose track of it in the future.
- I got an error—what should I do? If you see an error telling you that you don’t have permission to copy to that drive, select the drive’s icon in the Finder and choose File > Get Info to open the Info window. If necessary click the triangle next to Sharing & Permissions, and make sure “Ignore ownership on this volume” is selected. If it’s not, click the lock icon, enter an administrator name and password, and select the checkbox.

- How long will it take to copy? Quite some time, depending on how many photos you have. It’s best to do overnight or when you don’t need to use Photos.
- When it’s done copying, double-click the new Photos Library icon on the external hard drive to launch Photos and set it to open that new copy on future launches.
- If you use iCloud Photos, designate this new library as the System Photo Library by choosing Photos > Preferences > General and clicking the “Use as System Photo Library” button.
- Scroll through your photo collection and make sure all your photos are present—double-click a few of them to spot check that the actual images open properly.


Obviously, your original Photos library is still taking up space on your SSD, but it’s best to use the new version for a little while before deleting the old one, just in case. When you’re ready to do that, drag it from the Pictures folder to the trash and choose Finder > Empty Trash to reclaim the space.
Social Media: Running out of space on your internal drive? You can clear a bunch of space by moving your Photos library to an external hard drive—here’s how:
Need to Merge Photos Libraries? Here Are Your Options
Photos makes it easy to create and switch between libraries. That’s good when photos need to be kept completely separate. For instance, a real estate agent might want to keep personal photos separate from house photos taken for work. But too much separation is annoying—you have to keep switching between libraries, and it’s easy to import new photos into the wrong one.
If you struggle with multiple Photos libraries, never fear—you can merge them. Unfortunately, the process is slow, can require a lot of disk space, and may result in the loss of some metadata. You have three options: merging through iCloud Photos, using the PowerPhotos utility, and merging by exporting and importing. Each has pros and cons.
Merge through iCloud Photos
Apple’s iCloud Photos service offers the best solution for merging libraries. The trick is that whenever you designate a library as your System Photo Library, Photos automatically uploads all images that aren’t already present, adding them to the photos already in iCloud Photos. It also retains all the metadata surrounding your photos—titles, keywords, albums, facial recognition, projects, and more.
On the downside, using iCloud Photos almost certainly won’t be free unless you have so few photos that the combined library will fit within the free 5 GB of iCloud space Apple gives everyone. Almost everyone will have to pay for additional storage space ($0.99 per month for 50 GB, $2.99 for 200 GB, or $9.99 for 2 TB) for at least the month in which you’re doing the merge. iCloud Photos is a good service, so it’s likely worth paying for anyway.
More problematic is that the iCloud Photos way of merging will be very slow. If you haven’t already started using it, it could take a week or more to upload many thousands of photos. Plus, it will probably download the entire cloud-based collection of photos to each library whose photos you want to merge, so you may need a lot of local disk space too.
If you haven’t previously used iCloud Photos, go to System Preferences > iCloud and click the Options button next to Photo. In the dialog, select iCloud Photos.

Now, starting with the smallest Photos library and working up in size, follow these steps for each library you want to merge:
- Double-click the Photos library to open it.
- In Photos > Preferences > General, click Use as System Photo Library. (If it’s dimmed out, that library is already set as the System Photo Library.)
- Wait for photos to upload. Scroll to the bottom of the Photos view to see the progress. A Pause link will appear there during uploading—click it if you need to keep Photos from overwhelming your Internet connection. Once the photos have all uploaded, go back to Step 1 with your next Photos library.

When you’re done, the last Photos library becomes the one you’ll keep, and you can delete the others. Needless to say, make sure you have good backups first!
Merge with PowerPhotos
The $30 PowerPhotos from Fat Cat Software provides a variety of extra capabilities when working with Photos. It helps you to create and manage multiple libraries, copy photos between libraries, find duplicates, and—most important for this topic—merge libraries.
Because PowerPhotos is working entirely on your Mac’s drive, it’s fast and it doesn’t require huge amounts of extra disk space. Unfortunately, unlike the iCloud Photos approach, which brings in both originals and any edits to those photos, PowerPhotos can import only your original photos or the versions that you’ve edited, not both. Plus, it can’t merge facial recognition data, smart albums, or print projects.
PowerPhotos provides an actual interface for merging too—choose Library > Merge Libraries to start.

In the window that appears, you have four tasks:
- Choose source libraries. You aren’t limited to merging just two libraries; you can pick multiple sources.
- Choose the destination library. This is the library you want to receive all the photos. If you want, you can create a new one.
- Configure duplicate handling. PowerPhotos can import just one of several copies of duplicate photos, or you can bring in all the duplicates if that’s important.
- Choose options. PowerPhotos can merge album contents, create an album from each source library, and create a backup before merging. Most important, though, is the choice of whether to merge your original photos or the edited versions.
Merge by Exporting and Importing
This final option is conceptually simple. You export all the photos from one library and then import them into another. It’s even what Apple recommends. The main thing it has going for it is that it’s free, and it will be faster than the iCloud Photos approach. It could also be useful if you want to copy a subset of photos between libraries, rather than merging all photos.
However, as with PowerPhotos, you have to choose between original and edited photos, and you’ll need a lot of extra disk space. Even worse, you’ll lose even more metadata, including albums, faces, and print projects. And if you export as JPEG, your photos may also suffer a slight quality drop as they’re recompressed.
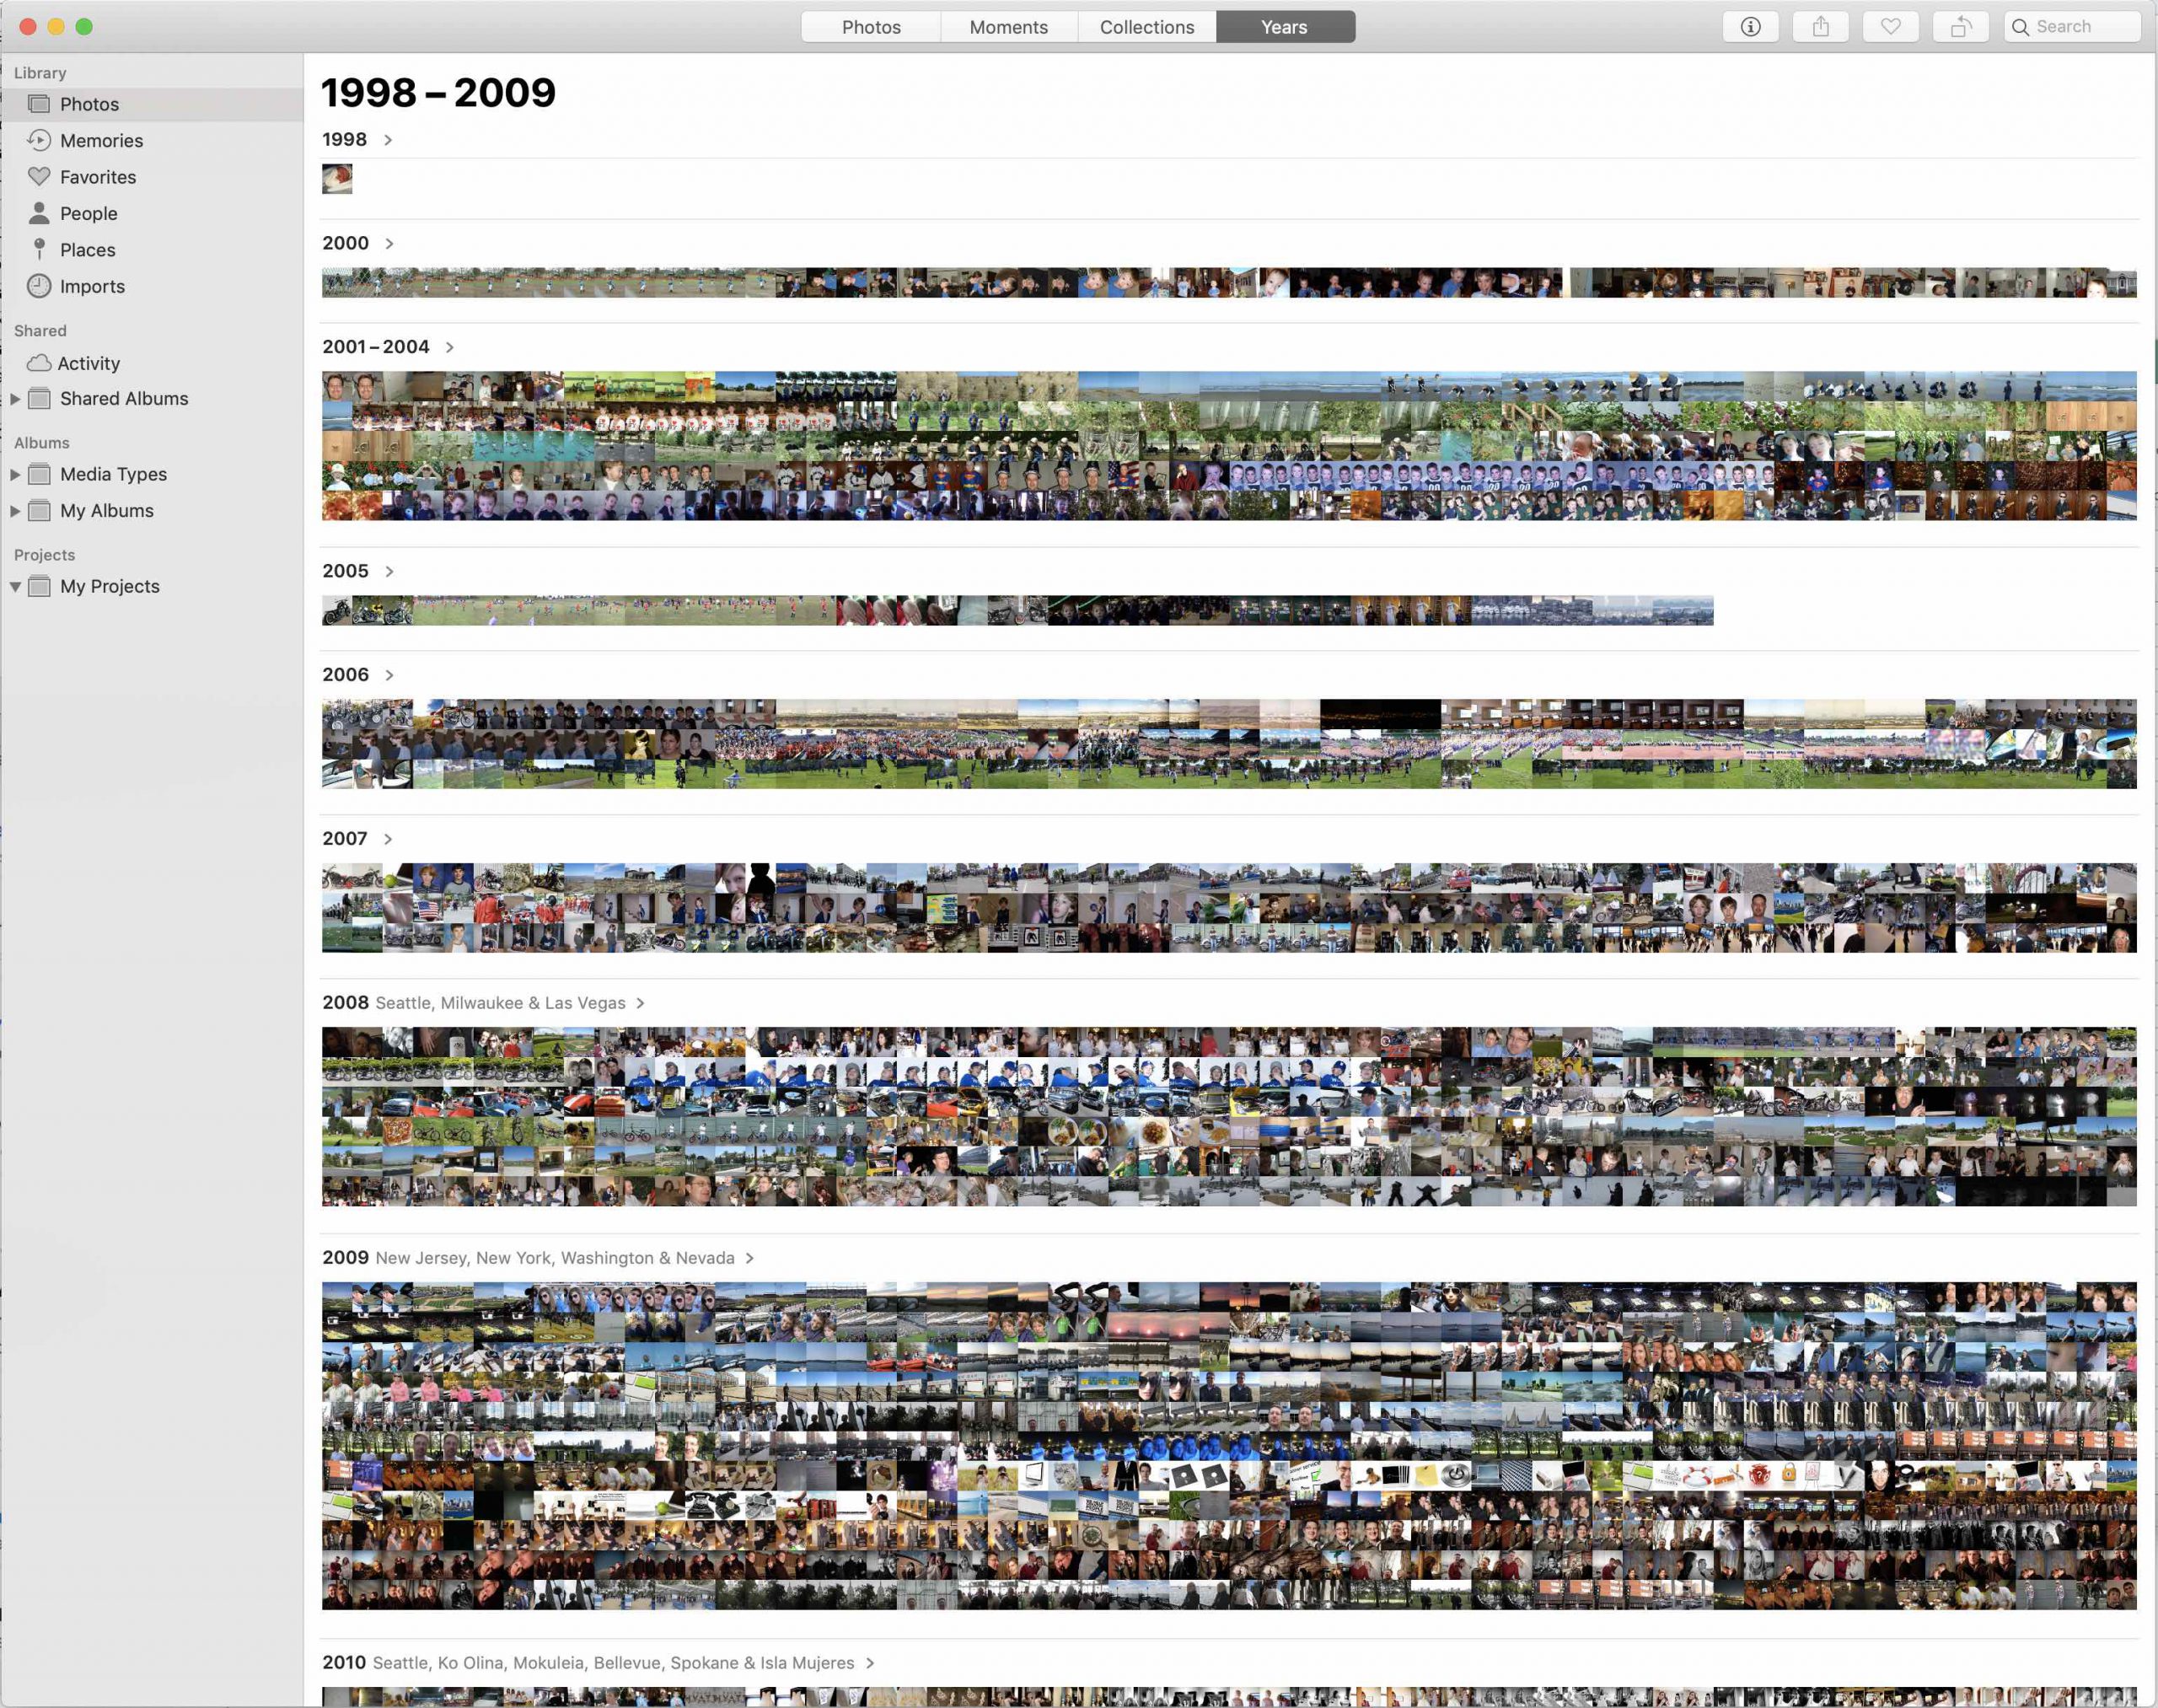
For those who want to use this approach, Apple provides detailed instructions. In essence, you’ll click Photos in the sidebar to see everything, and then choose Edit > Select All. Then you’ll choose File > Export and either Export X Photos (to get the edited versions of images) or Export Unmodified Original for X Photos (to get the original images). Once everything has exported, you’ll switch libraries in Photos and then drag the folder of exported images back into Photos to import it.
Our nod goes to the iCloud Photos technique, but PowerPhotos is a fine utility for those who aren’t perturbed by its limitations. Of course, don’t start any merging without making backups first, and if you need help, don’t hesitate to call us.
Social Media: If you want to merge Photos libraries to avoid having to switch back and forth, there are several approaches you can take, but each comes with pros and cons. See them all at:
Photos Not Syncing between Devices Properly via iCloud Photos?
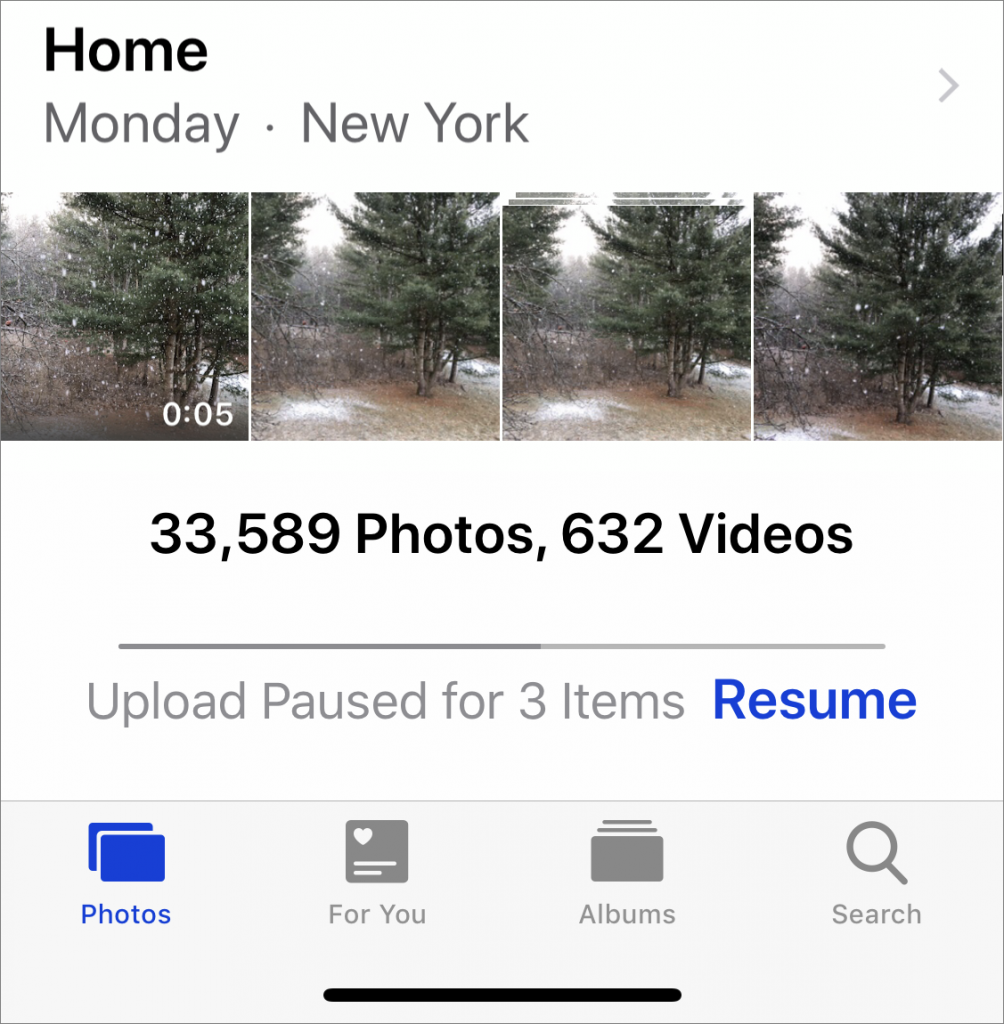
iCloud Photos (which Apple previously called iCloud Photo Library) is wonderful when it’s working. Take some photos on your iPhone, and they appear on your Mac and iPad a minute later. Delete unnecessary shots and edit the others on your Mac, and your iPhone and iPad reflect those changes almost immediately. But what if changes aren’t syncing? Photos in iOS and macOS can pause syncing for a variety of reasons, and sometimes it doesn’t restart when it should. To see if this is happening, go to the very bottom of the Photos view in Photos, where it lists the number of photos and videos you have stored. Below that number is the sync status. If it has a reason and a Resume link, click or tap Resume to start it again.

The Secret Keyboard Shortcut for Comparing Before/After Edits in Photos on the Mac
Photos on the Mac provides so many editing tools that it’s easy to lose track of how an edited image compares to the original. You can always use the Revert to Original command and then undo it, but that’s fussy. Instead, Photos provides a Show Original ![]() button in the upper-left corner, between the window controls and the Revert to Original button. Click and hold it to see your original image; let up to see the edited version again. Even easier, press the M key on your keyboard. The only thing either of those techniques won’t do is show the effect of cropping; to see the uncropped original, press Control-M. And if you just want to see how a particular set of adjustment controls affected the image, click its blue checkmark
button in the upper-left corner, between the window controls and the Revert to Original button. Click and hold it to see your original image; let up to see the edited version again. Even easier, press the M key on your keyboard. The only thing either of those techniques won’t do is show the effect of cropping; to see the uncropped original, press Control-M. And if you just want to see how a particular set of adjustment controls affected the image, click its blue checkmark ![]() to turn it off and back on.
to turn it off and back on.


Remember That You Can Search for Nearly Anything in Your Photos Library
Apple’s Photos app on the Mac can identify thousands of different objects in your photos, so it’s easy to find photos based on their content. You can find objects (cars and trains), scenery (beaches and forests), and even some events (weddings and parades). This is both big fun and useful for those times when you can’t remember when you took a photo, but do remember what’s in it, like a cat, camera, or carousel. To carry out a search like this, type the search term into the Search field on the right side of the Photos toolbar. From the list that appears, choose the Category result. In macOS 10.13 High Sierra’s version of Photos, you can filter your results from the Showing menu at the upper right of the window. The feature isn’t perfect, so you may see some odd results or miss some photos, but it’s way faster than browsing manually!

Let Your Fingers Do the Walking: 13 Essential Trackpad Tricks for Mac Users
A trackpad is not a mouse. In some ways, that’s obvious—you swipe your fingers on it, rather than dragging it around. Less obvious, however, are the many gestures that make using a trackpad on your Mac faster and more fun. These gestures aren’t limited to laptop users, thanks to Apple’s Magic Trackpad 2, which brings gesturing goodness to any desktop Mac. Here’s how to put your fingers to work.
Four Fingers on the Trackpad
The four-fingers-down gestures are dramatic and an easy way to appreciate the power of trackpad gestures, so we’ll start with them.
Say you have a lot of windows open, and you want to move them all aside quickly so you can open a file on the Desktop. Place your thumb and three fingers together on your trackpad and then spread them outward. Your windows scurry to the edges of the screen. To bring the windows back, reverse the gesture, pinching your fingers in toward your palm.
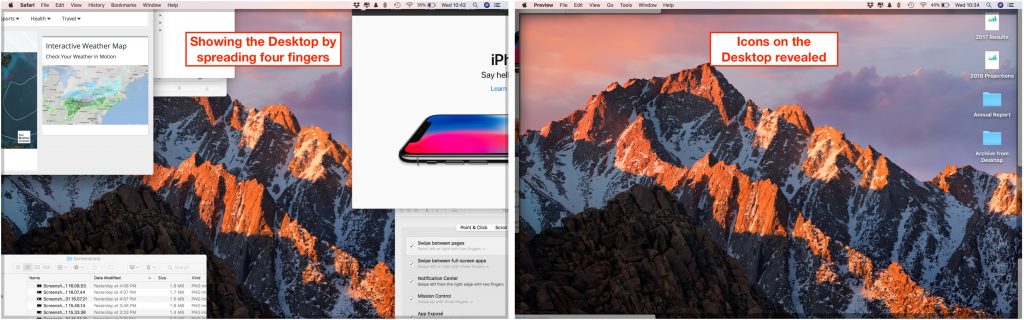
If you haven’t moved windows aside, pinching your thumb and three fingers together instead opens Launchpad, which shows icons for installed apps. Click an icon to open that app, or use the spreading four-fingered gesture to exit Launchpad.
Three Fingers on the Trackpad
Move three fingers horizontally on your trackpad and either nothing will happen, or you’ll switch to a different “desktop space.” This state of affairs is most easily seen by making an app full-screen. For instance, open Safari and click the green full-screen button at the upper left of the window. Safari takes over the entire screen, including the menu bar (to put it back, hover the pointer at the very top of the screen to see and click the green button again).
Now swipe left and right horizontally to switch in and out of the Safari space. As you make more apps full-screen, they’ll each create their own space. (If you’ve enabled Apple’s Dashboard, you may see it at the far left.)
What if you swipe vertically with three fingers? Swipe up to enter the All Windows view of Mission Control, which shows all open windows as thumbnails, plus desktop spaces in the top bar. Click any thumbnail to switch to it, or jump to any space by clicking it. You can also click the plus button at the upper right or drag any window into the top bar to create a new space. To move a space’s apps back to the current space, hover over a space on the top bar and click the close ![]() button that appears. To exit All Windows view, swipe down with three fingers.
button that appears. To exit All Windows view, swipe down with three fingers.

If you haven’t invoked All Windows view, swiping down with three fingers instead invokes App Exposé view, which displays thumbnails of all open windows in the current app. Click any one to switch to it. Swipe right or left with three fingers while in App Exposé to switch between apps.
Finally, on older MacBooks that don’t have Force Touch-capable trackpads, tap with three fingers on words to look them up, on files to preview them with Quick Look, and more. With newer MacBooks, if you have “Force Click and haptic feedback” enabled in System Preferences > Trackpad > Point & Click, you can instead “force click” with one finger for these features. That involves clicking on something and then pressing firmly without letting up.
Two Fingers on the Trackpad
The two-fingered gestures are easy to get your head around:
- In Safari, swipe left on a page to go back in that tab’s page history or right to go forward.
- Also in Safari, tap two fingers on the trackpad to zoom in on the content. Another two-fingered tap zooms back out.
- In Photos, and some graphics apps, zoom in and out by pinching with two fingers, and rotate selected objects by putting two fingers on the trackpad and turning them. A two-finger pinch also zooms the page in Safari.
- To open Notification Center quickly, swipe left from off the right-hand edge of your trackpad. Swipe back to the right to close Notification Center.
Changing Your Preferences
If you need a refresher on all these gestures, open System Preferences > Trackpad. Look in the Point & Click, Scroll & Zoom, and More Gestures panes to see a video for each gesture. You can also adjust which ones are active and how many fingers they require.

With so many gestures on offer, it’s worth your time to explore everything you can do with your trackpad.
Social Media: Did you know that you can make your Mac dance (well, not literally) with two-, three-, and four-fingered gestures on the trackpad? Read on to learn more.
Apple Is Discontinuing Its Photo Printing Services—Here Are 7 Alternatives
Sad news: Apple is discontinuing its photo printing services, which enabled you to create and order physical prints, cards, calendars, and books from within Photos on the Mac. If you’re building such a project right now, be sure to place your order before September 30th, 2018. After that, Apple is directing users to download a Photos Project Extension from the Mac App Store. You’ll see this dialog whenever you click a project in Photos.
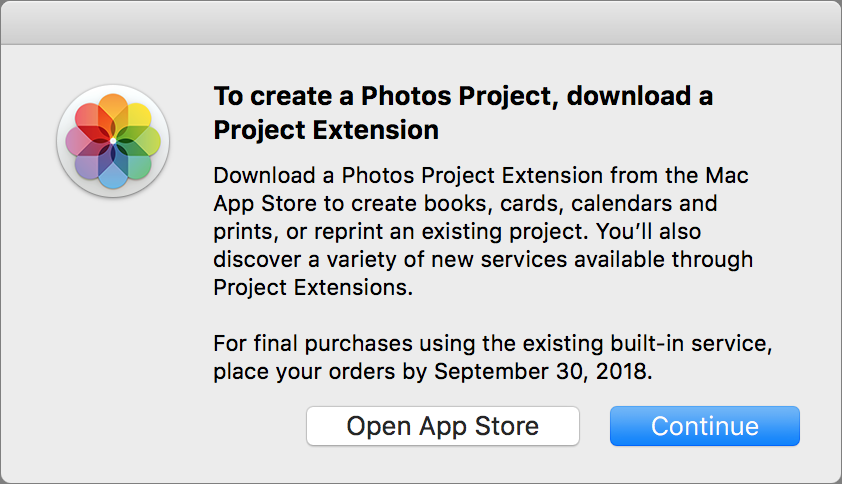
When you click the Open App Store button, Photos opens the App Store app and shows available Photos Project Extensions. (If you need to open this Mac App Store screen manually, search on appex:com.apple.photo-project.) Most of these extensions are free, since they’ll make their money when you order projects.
These extensions aren’t exact replacements for Apple’s projects, so let’s look briefly at what they provide.
Mimeo Photos
The extension that comes closest to providing the same products and features as Apple’s print projects is Mimeo Photos, which can create cards, calendars, and books. It offers a wide array of themes.

Motif
Motif looks quite similar to Mimeo Photos, also enabling you to create cards, calendars, and books with selected photos, and it comes from RR Donnelley, the company that was previously Apple’s partner for print projects. It doesn’t offer as many themes or options as Mimeo Photos, but it has a better interface.

Shutterfly
Even though the popular Shutterfly photo service’s Web site lets you go beyond the basics to put your photos on a vast number of objects, such as pillows, candles, and trivets, the company’s Photos extension is limited to photo books. Happily, it provides quite a few different sizes and bindings, and numerous themes for each.

Fujifilm Prints & Gifts
The Fujifilm Prints & Gifts extension lets you order prints, cards, wall art, mugs and drinkware, magnets, T-shirts, puzzles, iPhone cases, and much more. However, it has a non-standard interface (basically the company’s Web site), and every time we switched out of the extension, it crashed and forgot which photo we’d had selected.

Mpix
Although Mpix seems to focus on prints, if you scroll down in the project list, the final option is Browse Mpix, which provides more possibilities, including photo books, calendars, collages, foil art prints, posters, keychains, magnets, playing cards, and business cards. Confusingly, with some of these items, Photos acts as nothing more than a window onto Mpix’s Web site, with no awareness of the photos you’ve selected.

WhiteWall
WhiteWall focuses entirely on prints, with high-end choices for exotic papers and options for mounting and framing. Supported sizes range from 8″ x 6″ up to 48″ x 36″. Unfortunately, the WhiteWall prices seemed high (a framed photo was between $130 and $530, depending on size), and once you select a particular paper or frame choice, there is no way to try another with the same photo without starting another project.

Wix
Unlike all the others, the Wix extension doesn’t put photos on physical products at all. Instead, it’s designed to create on-screen photo albums for Web sites designed with the Wix service. As such, it’s potentially extremely useful for Wix users, but not at all for everyone else.

It’s too bad that Apple is getting out of the print project business since the interfaces from these extensions tend not to be as good as what we’re used to from Apple. But if you like making yourself a calendar every year, you’ll probably do fine with Mimeo Photos or Motif, and the rest of the extensions do extend Photos’ printing capabilities in a big way.
Social Media: As of September 30th, you won’t be able to order prints, cards, calendars, or books from Apple in Photos. But several extensions do most of what Apple did, and others go well beyond!