Running Low on Space on Your Mac? Here’s How to Clear Unnecessary Data
Choose between Archiving and Deleting Messages in iOS Mail
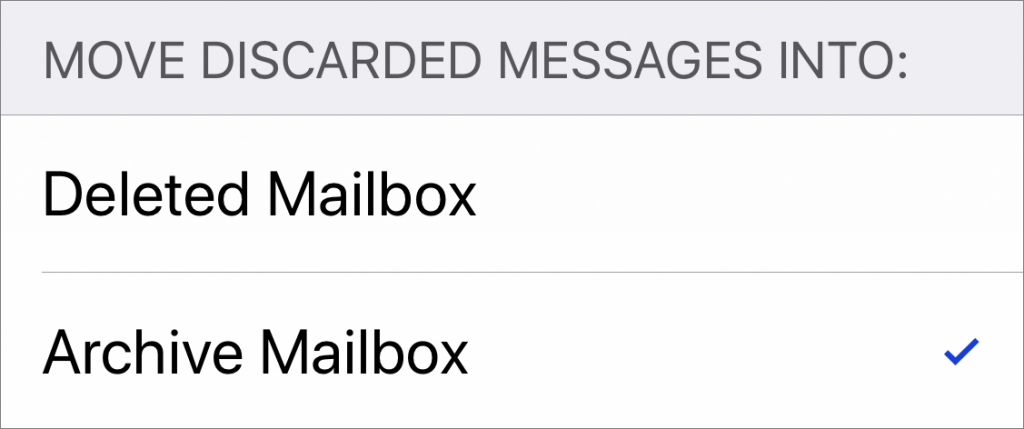
When you’re viewing a message in Mail on an iPhone or iPad, you get five buttons: Flag, Move, Archive or Delete, Reply/Forward/Print, and New Message. But what determines whether that third button is Archive or Delete? iOS hides that option in Settings > Passwords & Accounts > YourEmailAccount—the details then vary by account type before you see the Move Discarded Messages Into options.
- iCloud as your primary address: Mail (under Advanced) > Advanced
- iCloud as a secondary address: Account > Mail > Advanced
- Gmail or other email provider: Account > Advanced
But what if you want to archive a message when you have Deleted Mailbox selected, or vice versa? Simply tap and hold on the Archive or Delete icon, and a popover appears, giving you both choices.

Stop Mailing Files Around and Use Collaborative Apps
Photos Not Syncing between Devices Properly via iCloud Photos?
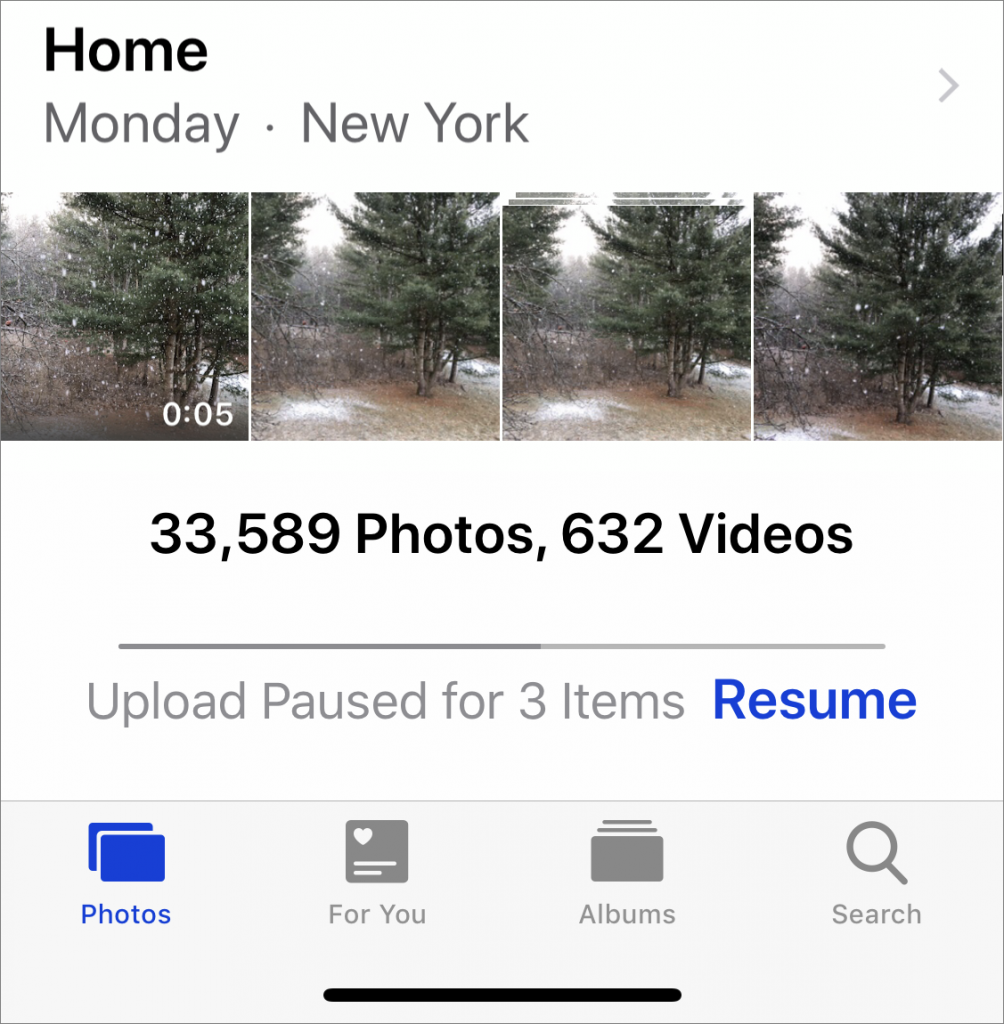
iCloud Photos (which Apple previously called iCloud Photo Library) is wonderful when it’s working. Take some photos on your iPhone, and they appear on your Mac and iPad a minute later. Delete unnecessary shots and edit the others on your Mac, and your iPhone and iPad reflect those changes almost immediately. But what if changes aren’t syncing? Photos in iOS and macOS can pause syncing for a variety of reasons, and sometimes it doesn’t restart when it should. To see if this is happening, go to the very bottom of the Photos view in Photos, where it lists the number of photos and videos you have stored. Below that number is the sync status. If it has a reason and a Resume link, click or tap Resume to start it again.
Did You Know Families Can Share Mac and iOS Apps Purchased from the App Store?
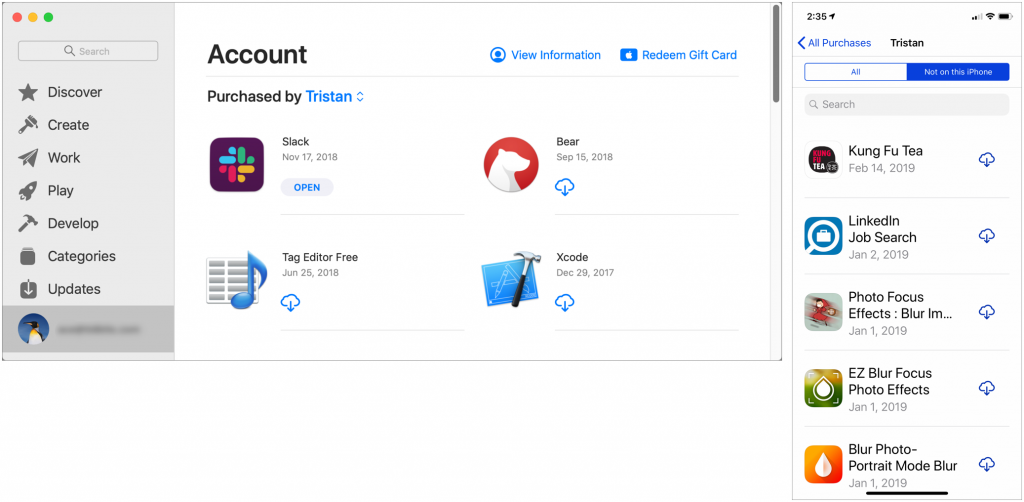
Have you ever looked over your spouse’s shoulder and thought, “Hey, that’s a cool app.”? If you set up Family Sharing (in System Preferences > iCloud on the Mac, and in Settings > Your Name in iOS), you can download almost any app that someone else in your family has purchased on either the Mac App Store or the iOS App Store. How you find these shared apps depends on the platform. On a Mac running macOS 10.14 Mojave, open the App Store app, click your email address at the bottom of the sidebar, and then click the name next to “Purchased by” to see another family member’s purchases. In iOS 12’s App Store app, tap your icon at the upper right, tap Purchased, and then tap a family member to see their purchases (note that you can select Not on this iPhone/iPad to narrow the choices). Click or tap the cloud icon to download a purchased app.
Easier Ways to Move the Cursor When Editing Text on an iPad or iPhone
Use Emergency Bypass and You’ll Never Miss a Call or Text from Important People
There’s little worse than missing an important call or text because your iPhone was in Do Not Disturb mode or because the Mute switch was engaged. If there are certain people—a spouse, parent, or child—whose calls and texts you always want to break through the cone of silence, iOS has a solution: Emergency Bypass. When enabled for a particular contact’s ringtone or text tone, Emergency Bypass ensures the sound and vibration will happen regardless of Do Not Disturb or the Mute switch position. To set up Emergency Bypass, edit the person’s contact card in the Phone or Contacts app, tap Ringtone, and enable Emergency Bypass. You can turn on Emergency Bypass separately for calls in the Ringtone settings and for texts in the Text Tone settings. And remember, you can always set someone’s tone to None and enable a vibration instead to ensure Emergency Bypass doesn’t allow a call to interrupt a movie, play, or concert.

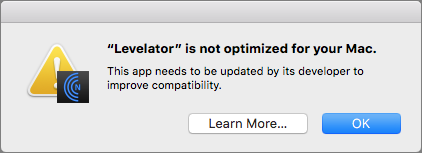
What’s with All These Dialogs Saying, “SomeApp is not optimized for your Mac”?
If you’re running macOS 10.13.4 High Sierra or macOS 10.14 Mojave, you may have seen a dialog that says an app isn’t optimized for your Mac. The message differs slightly between High Sierra and Mojave, with the High Sierra version telling you the developer needs to update the app to improve compatibility whereas Mojave saying bluntly that the app won’t work with future versions of macOS.

What’s going on here, what should you do, and when should you do it?
What’s Going On: 32-bit and 64-bit Apps
Over a decade ago, Apple started to transition all the chips used in Macs, along with macOS itself, from a 32-bit architecture to a 64-bit architecture. Without getting into technical details, 64-bit systems and apps can access dramatically more memory and enjoy significantly faster performance.
Apple knew it would take years before most people were running 64-bit hardware and 64-bit-savvy versions of macOS, so it allowed macOS to continue running older 32-bit apps. However, maintaining that backward compatibility has a cost, in terms of both performance and testing, so at its Worldwide Developer Conference in 2017, Apple warned developers that High Sierra would be the last version of macOS to support 32-bit apps “without compromise.” At the next WWDC in June 2018, Apple announced that macOS 10.14 Mojave would be the last version of macOS to run 32-bit apps.
Happily, the only “compromise” for 32-bit apps in Mojave is the warning dialog, which appears every 30 days when you launch an older app. But the writing is on the wall: 32-bits apps will cease working in macOS 10.15.
How Do You Identify 32-bit Apps?
Apple provides a tool to help you find 32-bit apps. Follow these steps:
- From the Apple menu, choose About This Mac and then click the System Report button.

- In the System Information utility that opens, scroll down to Software in the sidebar and select Applications. It may take a few minutes to build the list of every app on all mounted drives.
- When it finishes, click the 64-bit column header (No means 32-bit; Yes means 64-bit) to sort the list, and select an app to see its details in the bottom pane.


This technique works in both High Sierra and Mojave, but in Mojave, System Information includes a better-formatted section, called Legacy Software, that also provides a list of 32-bit apps. However, this list may be smaller because it includes only those apps that you’ve launched. Since it’s likely that you open old 32-bit apps only occasionally, you can’t trust the Legacy Software list to be complete.

If you find System Information’s Applications list overwhelming, check out the free 32-bitCheck utility from Howard Oakley. It performs exactly the same task but lets you focus on a particular folder and save the results to a text file for later reference.

What’s Your Next Step?
Once you know which apps won’t work in macOS 10.15, you can ponder your options. Luckily, you have some time. We expect Apple to release macOS 10.15 in September 2019, but you don’t need to upgrade right away—in fact, we recommend that you wait a few months after that to allow Apple time to fix bugs.
That said, we do encourage upgrading eventually, and if you buy a new Mac after September 2019, it will come with macOS 10.15. So you need to establish a plan—it’s better to know what you’re going to do than to be forced into action if you have to replace your Mac on short notice. For each 32-bit app on your Mac, you have three options:
- Delete it: It’s not uncommon to have old apps that you haven’t used in years and won’t miss. There’s no need to waste drive space on them in macOS 10.15.
- Upgrade it: Apps in active development will likely have a new version available. The main questions are how much the upgrade will cost and if there are compatibility issues associated with upgrading. You can upgrade at any time, although it’s likely worth waiting until you’re ready to move to macOS 10.15 to minimize costs. The apps that cause the most irritation here are things like the Adobe Creative Suite—Photoshop, Illustrator, and InDesign—that require switching to a monthly subscription.
- Replace it: If no upgrade is available, the cost of upgrading is too high, or upgrading comes with other negatives, it’s time to look for an alternative. This can take some time, so it’s worth starting soon to ensure that the replacement will provide the features you need before macOS 10.15 forces the decision.
Needless to say, if you’d like recommendations about how to proceed with any particular app or workflow, get in touch with us!
Social Media: Have you seen dialogs warning that an app isn’t optimized for your Mac? Here’s what’s going on, what you should do, and when you should do it:
A Quick Trick to Turn Your iPhone into a Magnifying Glass
It’s maddening to want to read a serial number or other bit of fine print that you can barely see. But fret no longer—your iPhone or iPad makes a fabulous magnifying glass! Assuming Magnifier is enabled in Settings > General > Accessibility > Magnifier, you can bring it up by pressing the Home button (for Touch ID devices) or side button (for Face ID devices) three times quickly. If that’s too hard to remember, you can also add a Magnifier button to Control Center in Settings > Control Center > Customize Controls. The special camera viewfinder is zoomed automatically, but you can change the zoom level with the slider, tap the flash icon to turn on the LED light (if available on your device), enable a filter to change the color or contrast, or lock the focus by tapping the lock icon. You can also freeze the image by tapping the white shutter button, which is great for grabbing a picture of a tiny serial number on the back of some device (tap that button again to resume using Magnifier). To leave Magnifier, press the Home button or swipe up from the bottom of the screen.
And YES – Jason Boettcher. I actually use this, because suddenly I have the eyes of a much older man. XOXO- T

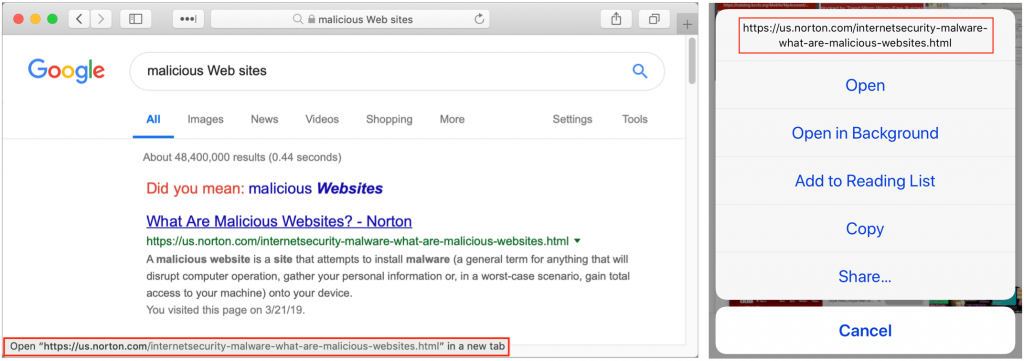
Look before You Leap with Safari’s Link Preview
When you follow a link in Safari, you generally don’t know where you’re going to end up. That’s fine most of the time, but what if you’re concerned that a site might be trying to trick you into going somewhere malicious? Safari provides an easy way to look at the URL under a link. On the Mac, choose View > Show Status Bar, hover your pointer over the link, and look at the bottom of the window. In iOS, touch and hold a link (don’t press for 3D Touch) until a popover appears, showing the link and giving you options for opening it. The most important thing to look at is the domain—us.norton.com in the screenshots. It should match where you think you’re going, or at least look reasonable. If the URL is dubious, don’t follow the link.