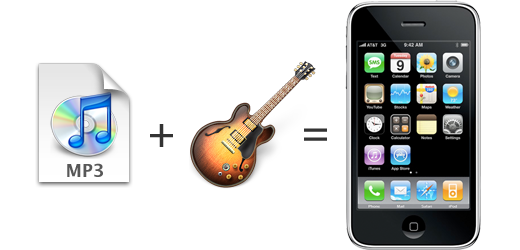
Here is a fun tip for anyone who happened to receive a new iPhone as a gift over the holiday. We’ve written up a short tutorial on how you can build and add your own custom ringtones using GarageBand.
GarageBand is a fun part of Apple’s iLife suite that sits untouched on most designer’s computers. If you’ve bought a new Macintosh recently, GarageBand is sitting quietly in your Applications folder waiting to be discovered.
Pick a few of your favorite MP3 files in your music collection, and use this technique to add a couple custom ringtones to your iPhone.
Step 1. Drag an MP3 into GarageBand.
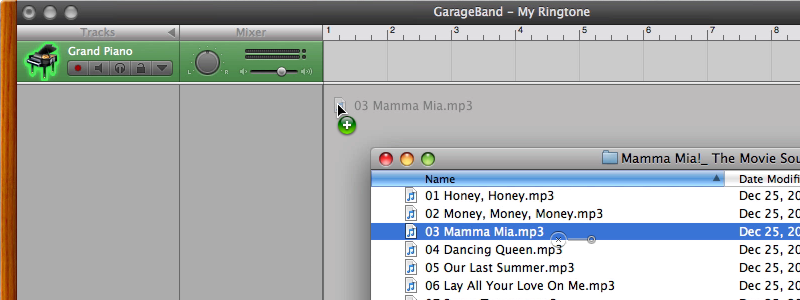
You can create a custom ringtone from any GarageBand song. If you don’t feel like composing your own original work, you can easily drag any non-protected music (MP3 or ACC files) from your computer into a new GarageBand document.
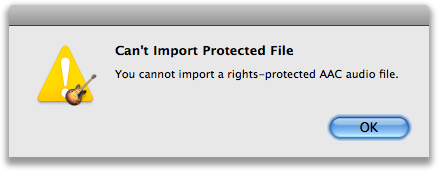 You can’t import rights-protected music files. When buying music from the iTunes store, look for DRM-Free music. Or shop at Amazon’s MP3 Store for an easy selection of all DRM-Free music.
Tip: You can also drag music files directly from an iTunes window into your new GarageBand document.
Step 2. Click the Cycle button in GarageBand.
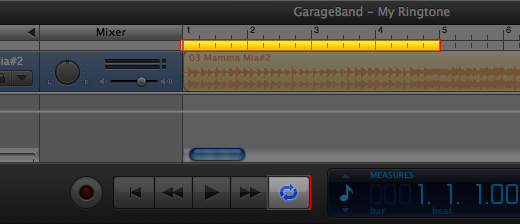
Click on the cycle button near the play button. That activates a yellow highlighter at the top of the timeline, just below the ruler, which indicates a cycle region that repeats when you click play.
Step 3. Trim your Ringtone using the Cycle Region.

Adjust the cycle region in the timeline to cover the portion of the song you wish to use as a ringtone. You can adjust the length of the cycle region by grabbing and dragging either end. You can adjust the position of the cycle region by grabbing and dragging it from the middle.
Note: This area must be 40 seconds or less in length. To show seconds in your timeline ruler, choose Control > Show Time in LCD. By default, GarageBand shows measures of your song, which is far less useful for trimming ringtones.
Step 4. Choose Share > Send Ringtone to iTunes.
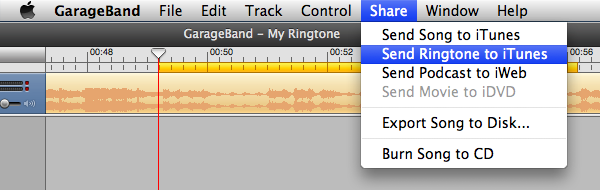
Note: If Send Ringtone to iTunes is dimmed or missing, be sure you are using GarageBand 4.1.1 or later, as well as iTunes 7.5 or newer.
Step 5. In iTunes, use the Ringtones pane to sync to your iPhone.
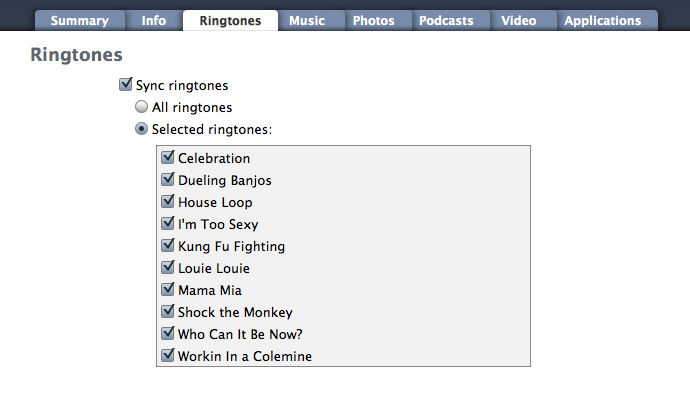
Be sure your iPhone is running software version 1.1.2 or later.
Step 6. Assign Ringtones to Contacts on your iPhone.
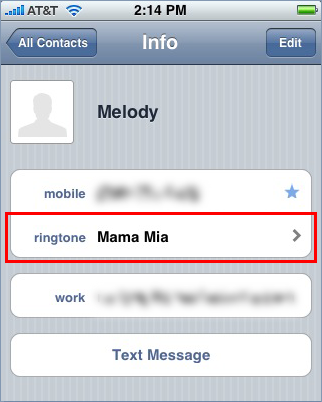 This is the fun (and slightly addictive) part. Once you’ve added ringtones to your iPhone, you can assign specific ringtones to individual people in your iPhone contacts.
Find a friend’s name in your iPhone contacts, and click on the ringtone option in that person’s contact information. You can assign any of your custom ringtones to that person’s phone number. When they call, you’ll know right away who is calling you without looking.
Embarrassing: My Ringtone List from Amazon’s MP3 Store.
Over the Christmas break I found myself adding custom ringtones to my own iPhone for the first time. This is a little embarrassing to share, but here is an Amazon playlist widget with a few of the songs I’m carrying as ringtones on my own iPhone now:
Source: This tip is dedicated to my lovely wife, Melody, who received a new iPhone 3G for Christmas. She requested a tip showing her how to add Mama Mia as her custom iPhone ringtone. Here it is.